Connecting from Windows
If you are connecting to HPC2N from a Windows system, you need to install an ssh client to connect. Several exists, both commercial and free. Here are some of the more common ones:
If you want to be able to open graphical displays (say for opening the Matlab graphical interface), you need an X11 server. These are commonly used:
You also need to transfer files between your own home computer and HPC2N's systems. You need to use a secure protocol, so either sftp or scp will work, but not standard ftp.
On this page we will give brief examples for Cyberduck, WinSCP, MobaXterm, PuTTy, Cygwin, and Xming.
In all cases, we strongly advice against saving passwords.
The simplest way to connect to HPC2N is to use either PuTTy together with Xming, or to use MobaXterm, unless you need a Linux-like environment on your Windows machine.
NOTE: remember that the accounts at HPC2N and SUPR are separate. In the welcome mail you got when your HPC2N account was created was a link to create a first, temporary password. When you have logged in using that, please change the password.
[PuTTY | PuTTY and X11 forwarding | Xming X server | MobaXterm | Cygwin | WinSCP | Cyberduck ]
SSH clients and X11 servers
PuTTY
- Download from here.
- Get the Zip file with both PuTTY, PSCP, and PSFTP.
- Unzip, run putty.exe
- Under 'Session' enter the host name. Below it is entered for Abisko (abisko.hpc2n.umu.se). For Kebnekaise it is (kebnekaise.hpc2n.umu.se).
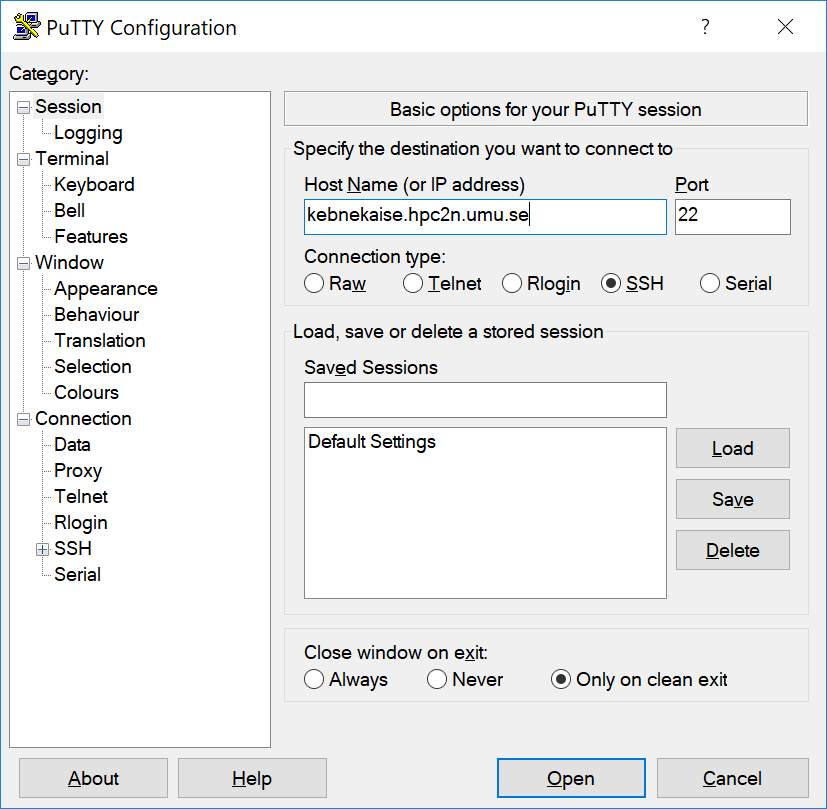
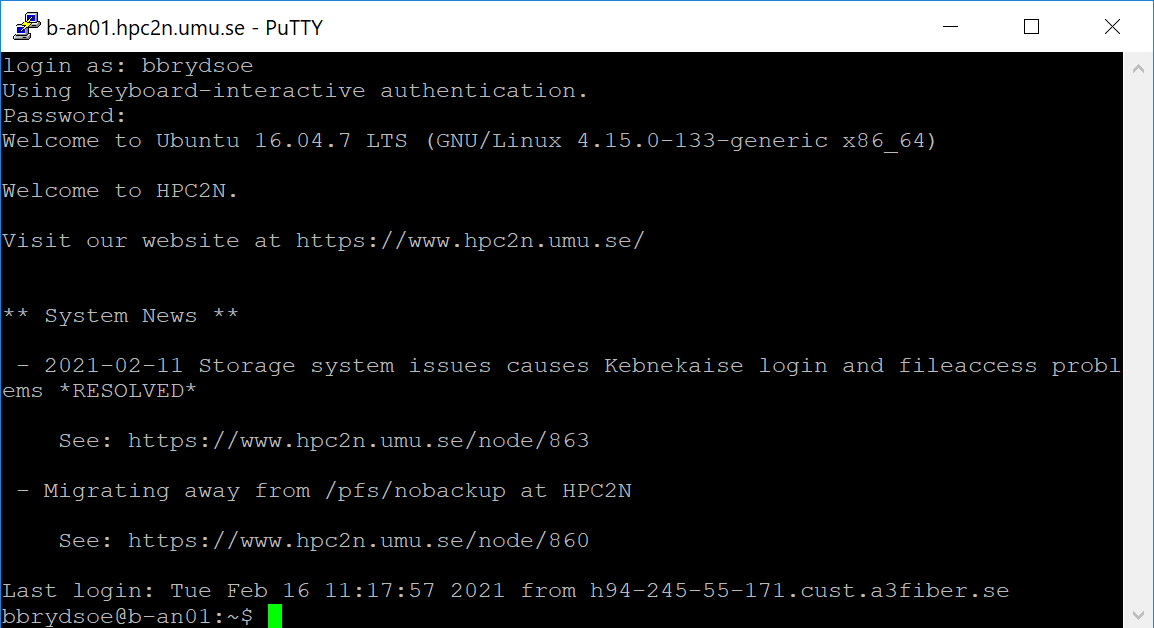
- When you click 'Open' you will be prompted for username and password.
PuTTy and X11 forwarding
If you need to open graphical interfaces from the remote system on your home computer then you need to enable X11 forwarding.
- Download and install an X server (for instance Xming)
- Start PuTTy
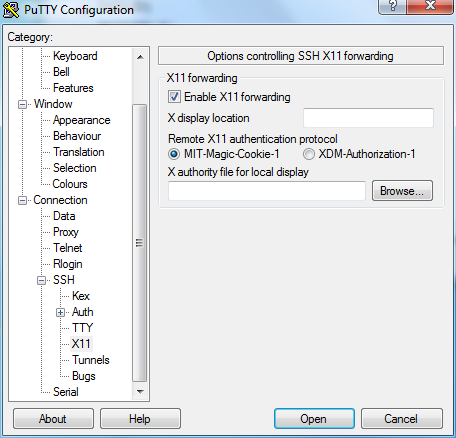
- On the left side, scroll down to 'Connection' and click to open the tree if it is not opened already
- Click to open the 'SSH' subcategory, and then click on 'X11'.
- Make sure 'Enable X11 forwarding' is checked. Note that this needs to be done for each saved session.
- Some older versions of PuTTY does not work correctly with X11 forwarding from our systems. Try upgrading to version 0.69 (known to work) or newer.
Xming X server
In order to use X11 forwarding in PuTTy (or similar), you need to run Xming before starting PuTTy.
You can now launch (for instance) PuTTY SSH client and enable X11 forwarding as shown earlier on this page.
MobaXterm
This program has both a freeware and a paid version. The freeware version works well for most users. It combines SSH client, X11 server, and SFTP file browser. NOTE that the free version has a number of limits, such as a time-limit on the filebrowser. You may therefore wish to use either FileZilla or WinScp for file transfers instead because of that.
It exists both as an installable version and as a single executable that can be run from an USB stick.
- Download from here.
- Get the Free / Home edition
- Extract it
There is a demo on their homepage, but here are the basic steps to connect to HPC2N's systems.
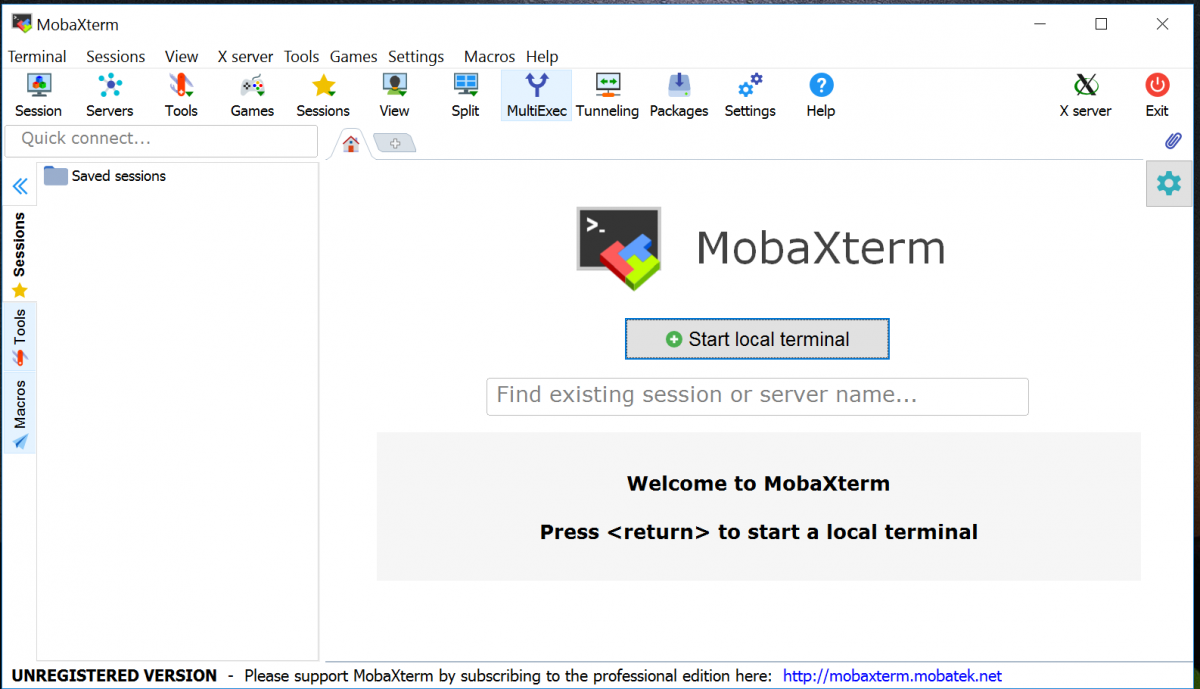
- Start the MobaXterm program
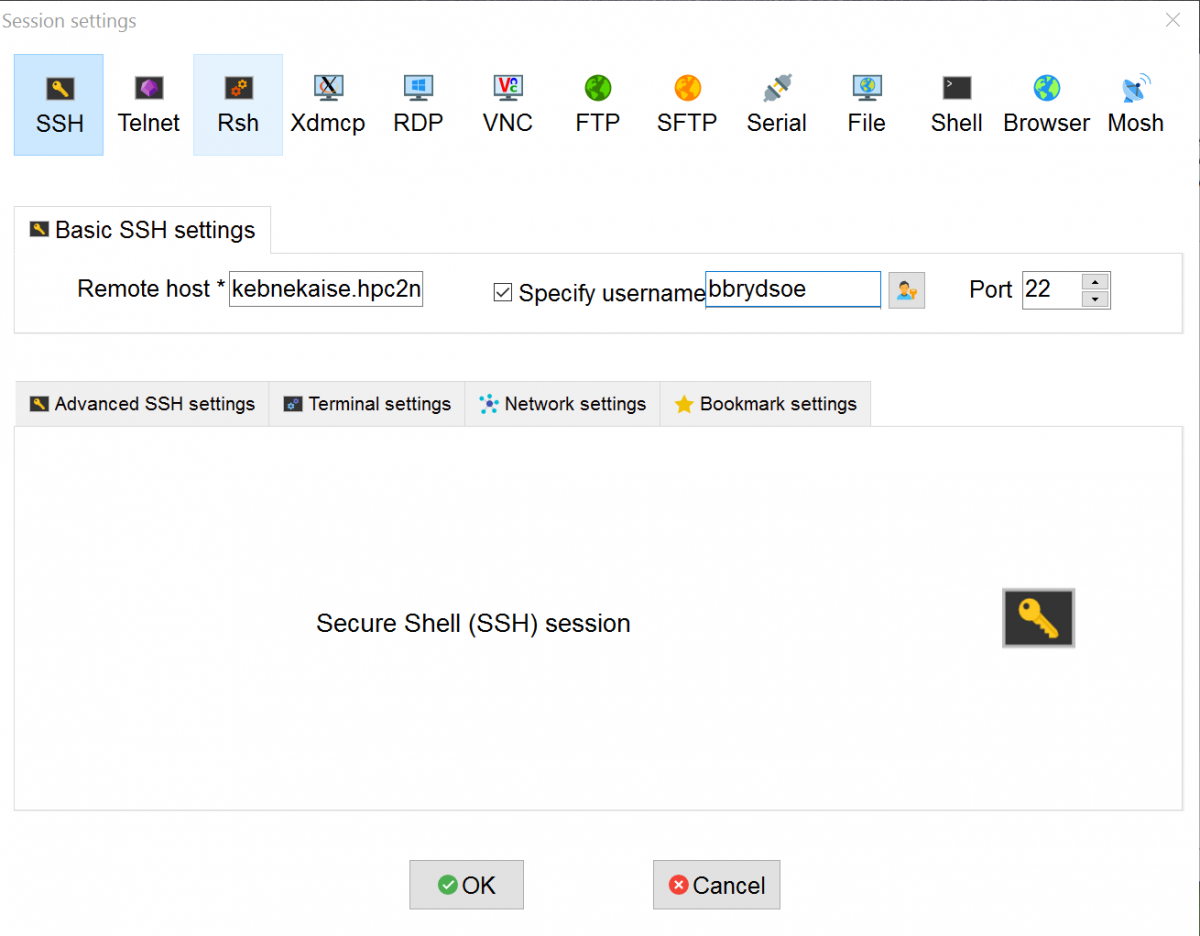
- Click 'Session' and then click 'SSH' in the new window that opens. Fill in the name of the remote host (either kebnekaise.hpc2n.umu.se or abisko.hpc2n.umu.se). Check 'Specify username' and fill in your own username (otherwise it will ask for your username when you connect to the system). Click 'OK'. (Your settings will be saved and you can login again by clicking on the host name under 'Saved sessions' on the start up window).
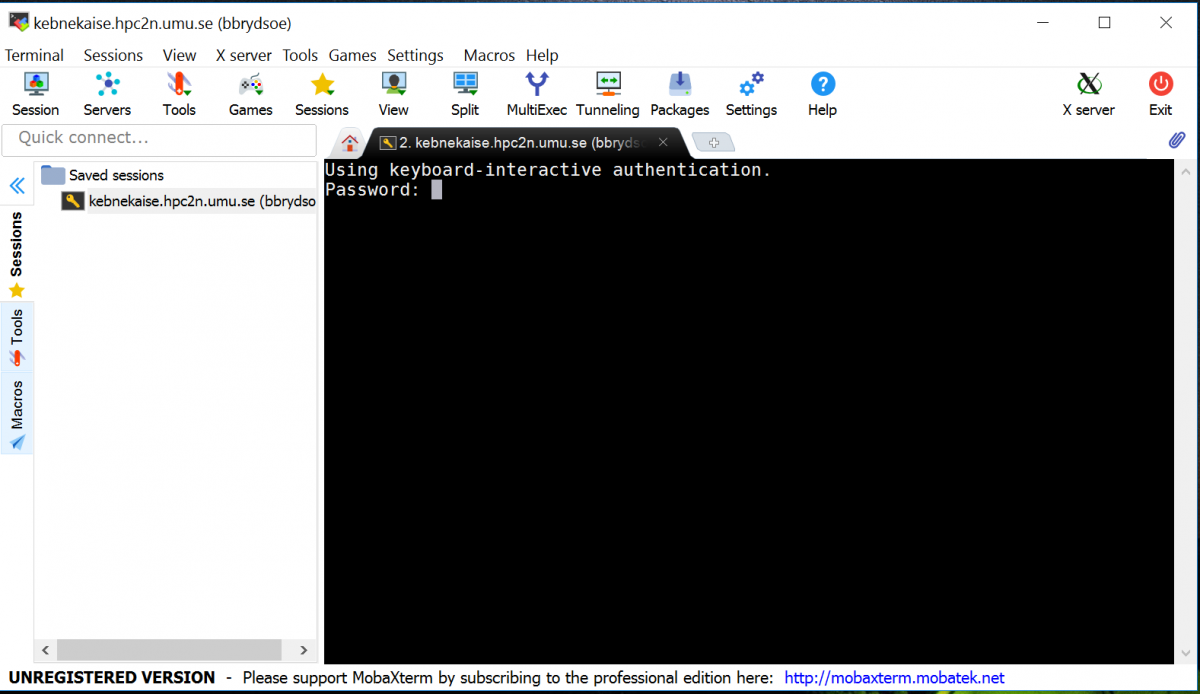
- A new window will open, asking for your HPC2N password.
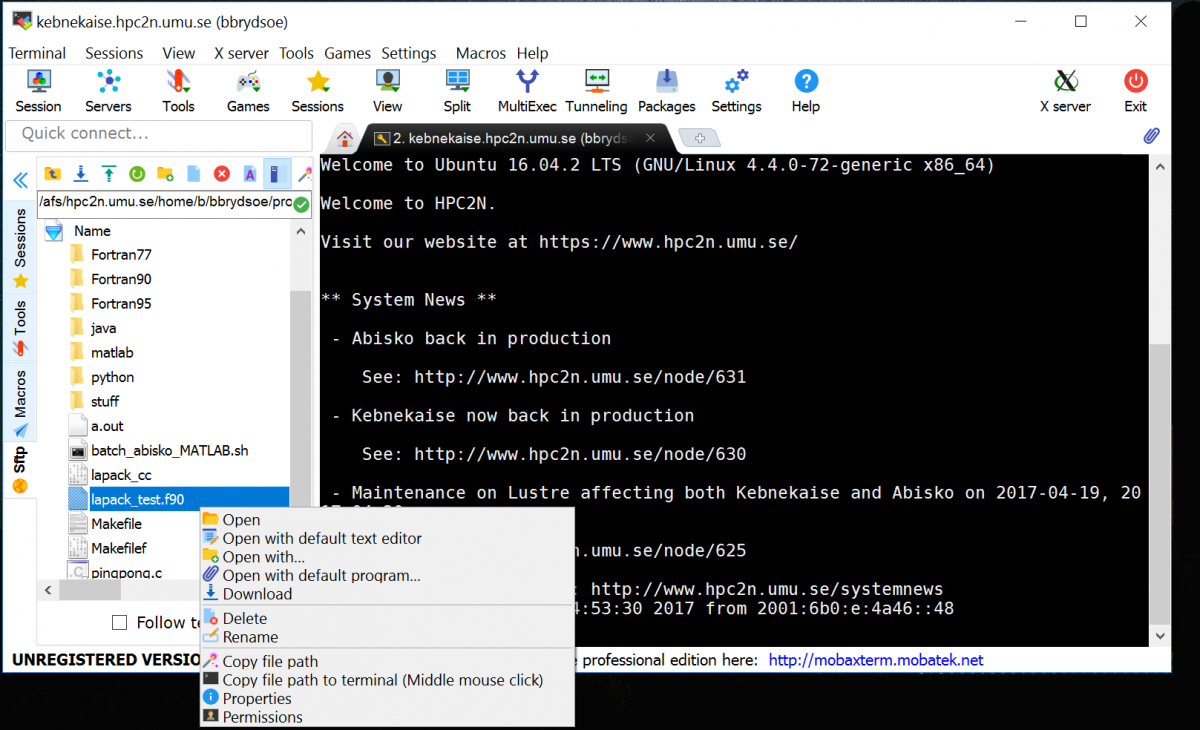
- When you have entered that, you will be logged on to the system (here Kebnekaise). Note that there is a file browser on the left with your files on the HPC2N system.
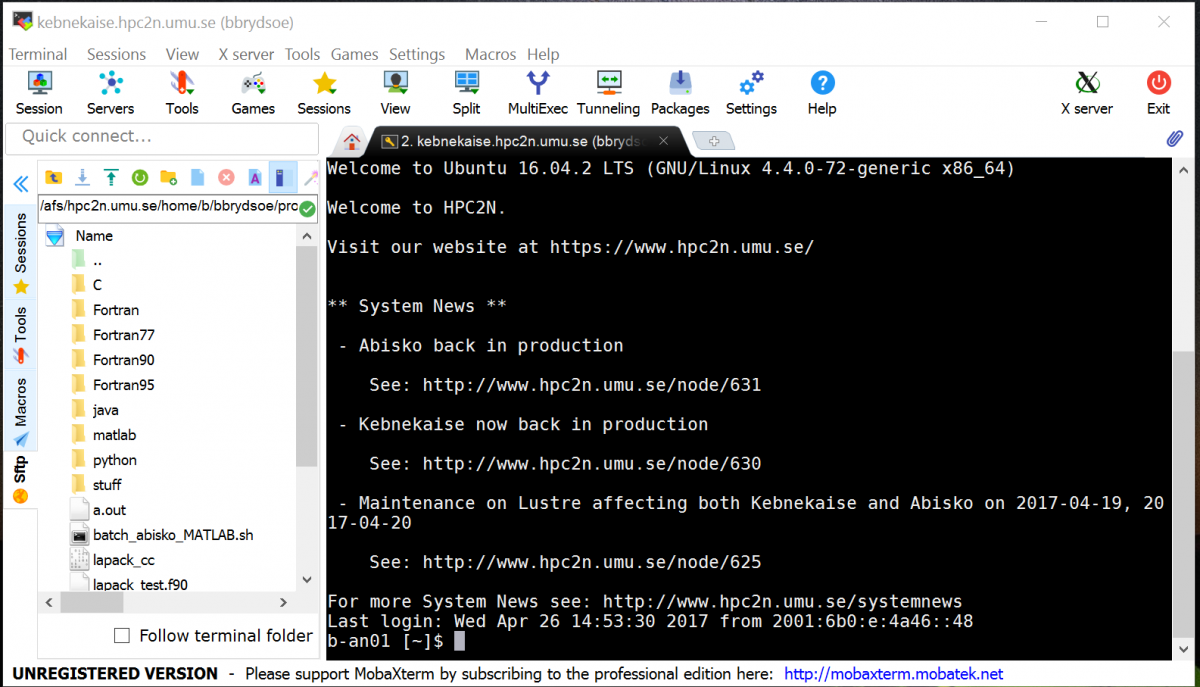
- Since an X11 server is running and the display is sat automatically, you can now open new windows/displays/graphical interfaces from the host you are logged in to, on your own local screen.
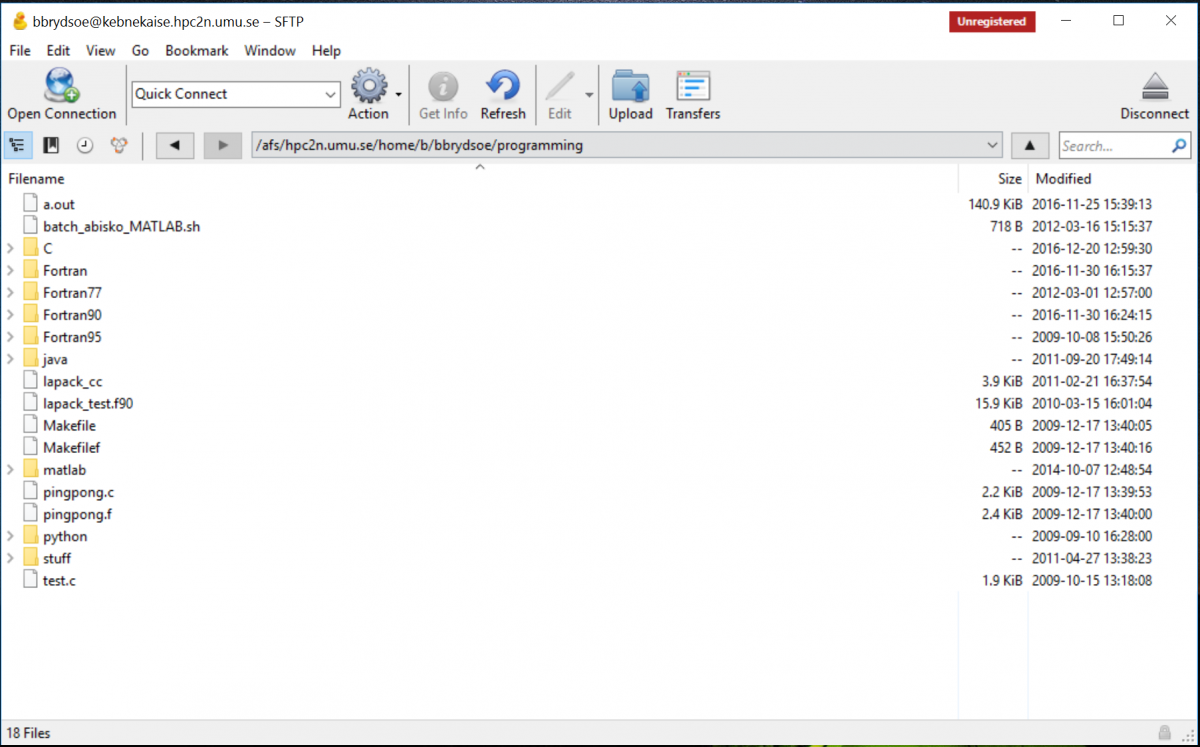
- You can also transfer files between your local system and the remote system (HPC2N) by using the file browser. Choosing download/upload or just drag-drop works. You can also do things like editing files on the remote system by double-clicking on a file in the file browser or right-clicking and choosing what to do. NOTE that there is a time-limit on the file browser in the free version, and you can not expect to do anything but minor edits through it this way.
Cygwin - installation
This is somewhat more involved, and mostly only worth it if you intend to use Cygwin locally on your Windows computer, in order to run a Linux-like environment. A longer description of the installation process can be found on Cygwin's pages.
- Download setup.exe from the Cygwin page
- After the initial file downloads, you will get the option to ’Select Package’. Go through and check any you think you would like, as long as you make sure the ones below are selected from X11 category
- xorg-server (required, the Cygwin/X X Server)
- xinit (required, scripts for starting the X server: xinit, startx, startwin (and a shortcut on the Start Menu to run it), startxdmcp.bat )
- xorg-docs (optional, man pages)
- X-start-menu-icons (optional, adds icons for X Clients to the Start menu)
- You may also select any X client programs you want to use, and any fonts you would like to have available.
- You may also want to ensure that the inetutils or openssh packages are selected if you wish to use telnet or ssh connections to run remote X clients.
- Under Graphics, it is recommended to select opengl packages.
- Install
Cygwin - connecting
The custom XWin startup utility startxwin starts the X server in multiwindow mode. startxwin is included in the xinit package, which you should have installed if you followed the description above.
Run startxwin by:
- Using the "XWin Server" shortcut under "Cygwin-X" on the Start Menu
- Starting /usr/bin/startxwin in a Cygwin shell, by typing
startxwin
You can get more documentation for
startxwin
by typing
man startxwin
in the Cygwin shell.
File transfers
WinSCP
- Download from here. Pick 'Installation package'.
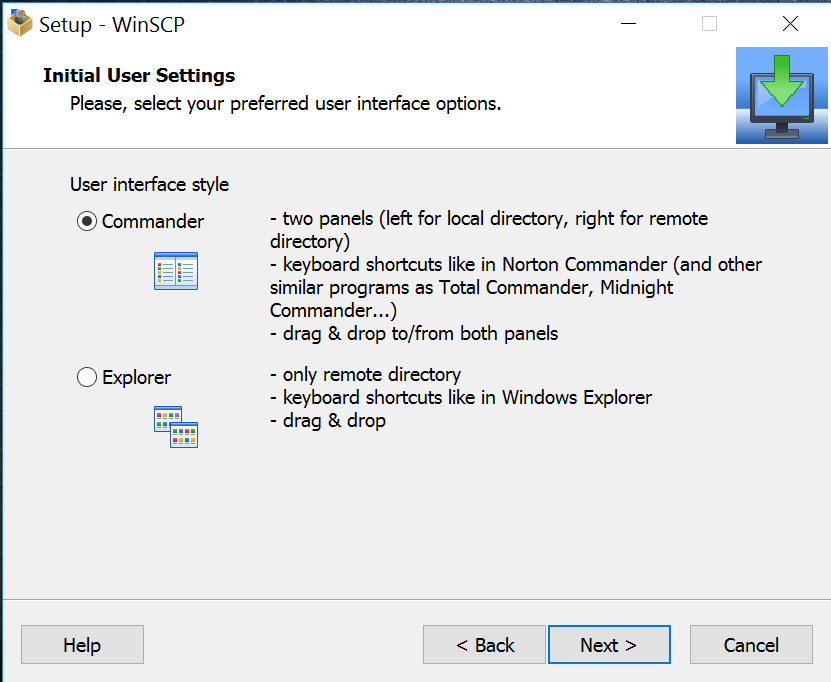
- Install. During the setup you will be asked to choose between 'Commander' and 'Explorer'. 'Commander' is probably the best for most people, but it is your choice.
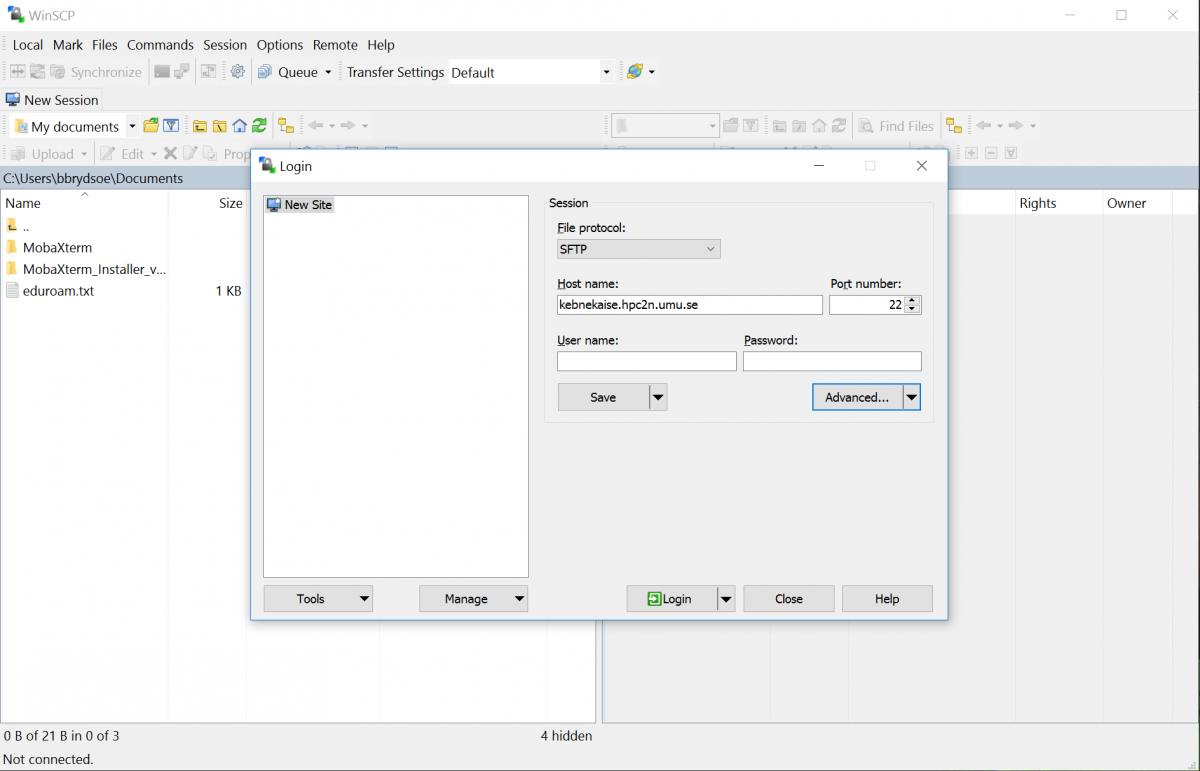
- When the program has installed, start it. Click 'New Session'. Enter the name of the remote host (kebnekaise.hpc2n.umu.se or abisko.hpc2n.umu.se). Put in your username and password. You can save the session settings so you do not have to enter it next time, but can just click it in the list that will be on the left, but we strongly recommend that you in that case do not save the password.
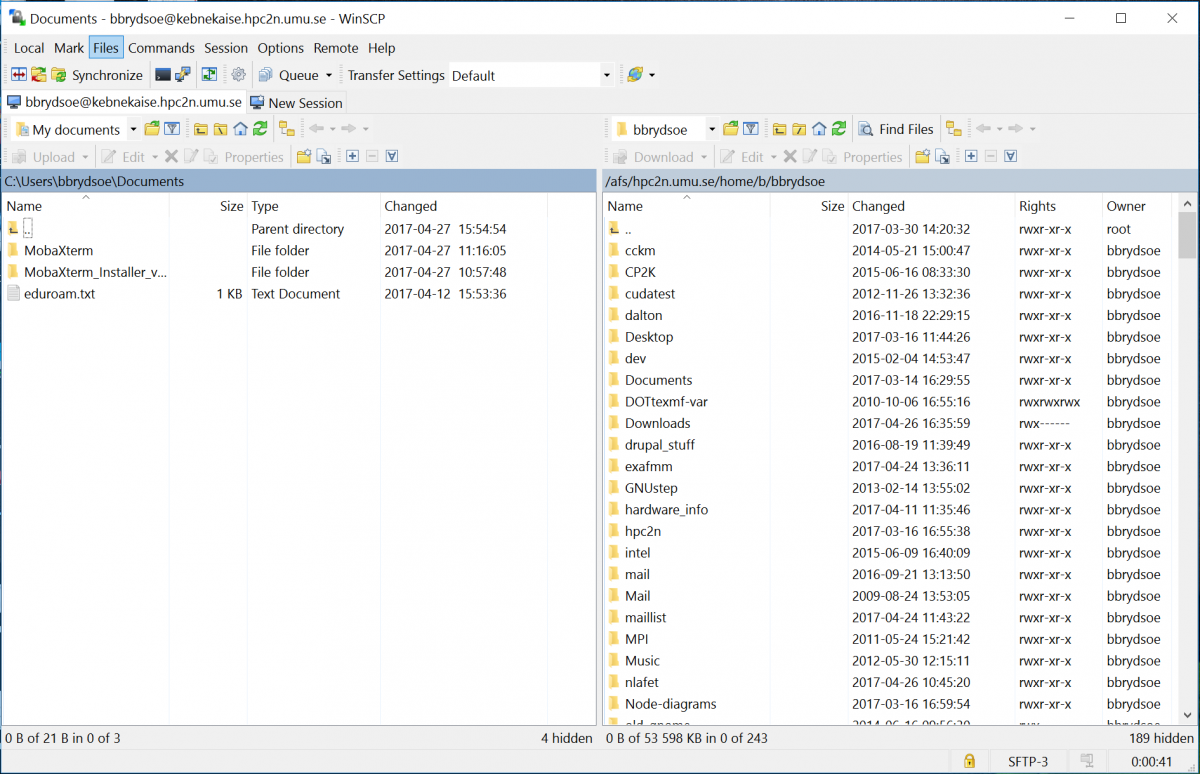
- When you log on to a remote host for the first time you will be asked if you want to continue connecting to an unknown server and add its host key to a cache. Say 'Yes'. You will now be logged in to HPC2N, to your home directory. You can change directories by clicking, and you can upload/download files with drag-drop.
Cyberduck
- Download from here. Pick the "Cyberduck for Windows" even if you have Windows 10
- Install
- Start the program
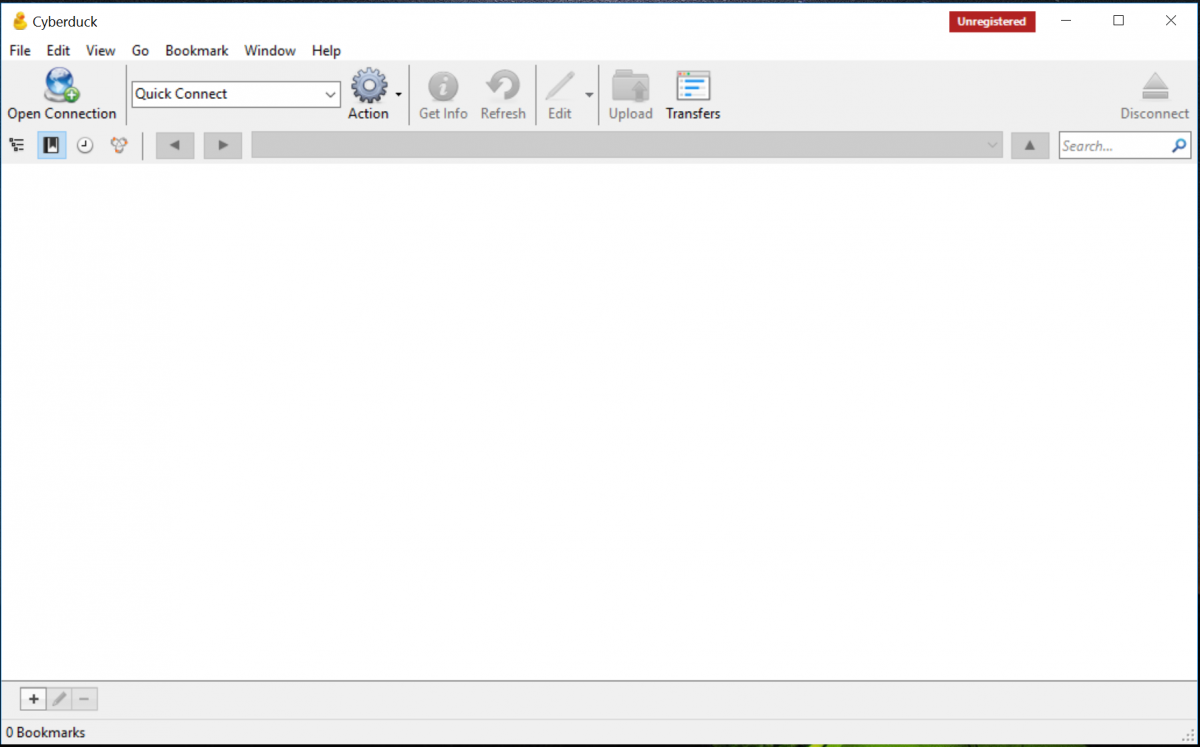
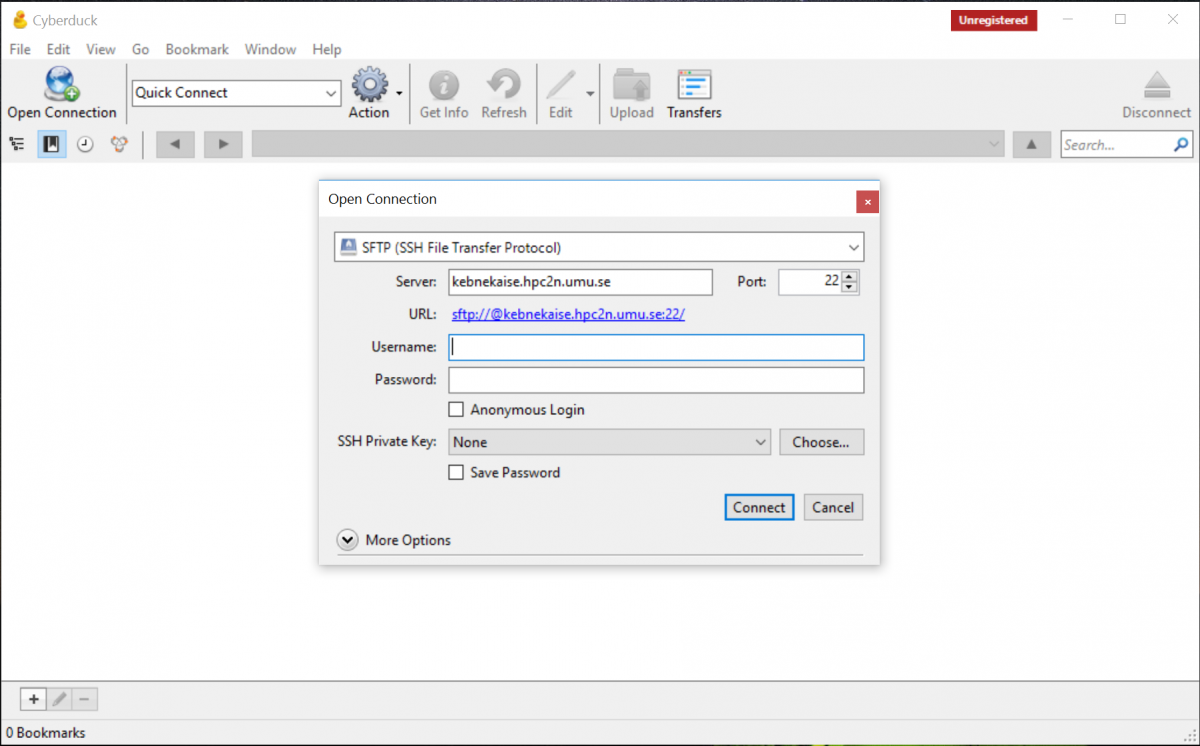
- Click 'Open Connection' and enter the name of the remote host (kebnekaise.hpc2n.umu.se or abisko.hpc2n.umu.se), Change the drop-down from 'FTP' to 'SFTP'. Enter your username and password for HPC2N. We strongly recommend that you do NOT save the password.
 />
/>
- When you connect the first time to a remote host, you will be asked if you want to Allow or Deny an unknown fingerprint. Allow it.
- You are now logged in. You will end up in your home directory. You can change directories and you can upload/download files with drag-drop.